No need to adjust your computer screen – yes this is two posts in one day. ;) Blogger had some issues last night and I couldn’t the post up, so it went live this morning.
Today I’m sharing a fun little craft project I’m linking up to Kate’s spring crafts party as a part of our Spring Fling linkies:

Soooo…I had a total blogger brain fart and forgot to mention Layla’s mantel party on Tuesday.
I suck.
I actually showed you our spring mantel in February (cause that’s totally appropriate):

And it hasn’t changed since. Honestly, it probably won’t change again till Christmas. ;)
Go link up your vignettes and mantels at Layla’s here!
So, onto the craft at hand…this one is super simple, it’s just time consuming. But mindless time consuming, so that’s good.
I saw this idea on Pinterest a couple months ago and have been planning on recreating it since!
I started with my new go-to wreath form – the pool noodle:

I’ve used one for a wreath before and it works GREAT! And wow, it’s cheap. The dollar store has them for…uhh…a dollar.
This one was a bit too long, so I cut it down with scissors, (it cut very easily) then used duct tape to secure the ends together:

Sorry, I didn’t clean for you. ;)
See? Perfect wreath form!
Because the pink was oh-so-bright, I got some green felt and hot glued it around:
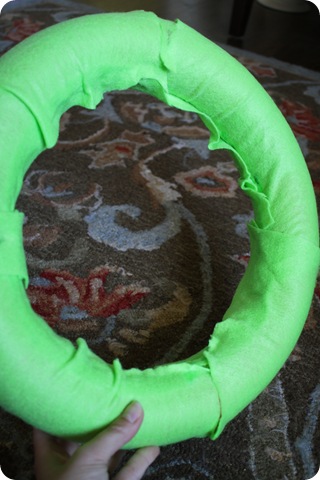
You’ll see why I wanted green in a bit. :) It took four pieces of felt and I didn’t worry at all about it being perfect, obviously.
Then grabbed my “fur” yarn:
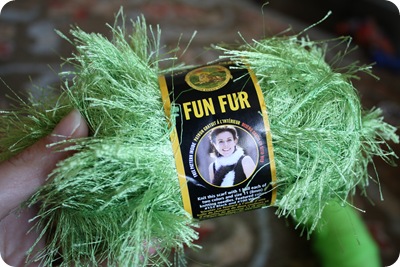
I got two of these, which I needed. I used about one and a half for the whole wreath.
Then you wrap. And wrap. Check your watch. Watch a soap. Wrap some more.
Stretch your sore right arm.
Wrap:
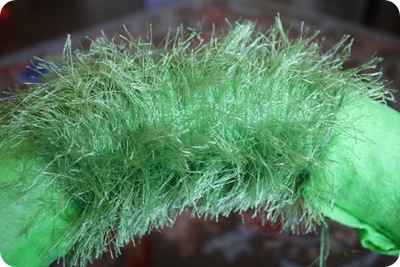
This yarn is very thin, so it took a while. I think maybe an hour total? But again, mindless. I like mindless.
Perfect project for vegging on the couch. :)
I found these cutie paper flowers at Michael's:

And you may be getting the idea…I “planted” them in the “grass” on the wreath:

I think it is stinkin’ adorable:

It’s perfect for spring! Very whimsical and I LOVE it.
Get ready…here it comes…
It’s so FLUFFY!!!!!
The Bub told me numerous times today how pretty it was. But it actually sounded more like “pwetty” when he said it. Melt.
I just took some ribbon I had and hot glued it to the top of the door – no wreath hanger needed. ;)
It looks great against the newish red door:

Obviously this wouldn’t be the best option for a door that is exposed to the elements. Our porch is tiny but I can hang just about anything on the door and it’s fine.
Total cost for me was about $10 – for the yarn and flowers (all on sale). Not too shabby!
I forgot a totally cute addition that was in my inspiration wreath:
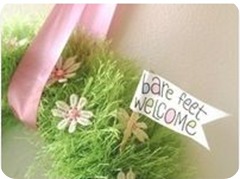 (source – so many fun ideas on that site!)
I may have to add that. ;)
We’ll continue the linkies next week with Rhoda on Tuesday and the spray paint party here on Thursday!
Well HEY! Today was a bit crazy because we’ve had some last minute progress on the basement, and I spent the day reading the second Hunger Games book all in one day as well.
I’ve been both super productive managing the basement process and crazy unproductive reading like mad. So confusing. I’m as hooked on this one as I was the first!! Only about 20 more pages, so this post may be quick. ;)
Anyway, I wanted to share the latest (completed) step in the basement finishing process. We started with figuring out where we wanted walls and then having them framed, and more recently had the lighting done.
Because the basement is kind of a mess of progress right now, and because pictures of lights are pretty much impossible, I’m showing you the placement via the floor plan. It’s a tad be more interesting than horrible pics of ceiling lights.
It won’t seem like it, but I swear it is. ;)
I mentioned before that I wanted TONS of lights down here, and after talking to our electrician, I realized that yes, it may be possible to have too many lights. The guys took me to a basement they had recently completed and I realized we probably don’t need 50 lights in the family room area. ;)
But by the time we were done, I did add a few more here and there. Here’s the layout and an idea of where the lights were installed (those would be the round dots):
![basement love[4] basement love[4]](http://lh5.ggpht.com/-KH-VIhI0ov4/T2qd00nXL2I/AAAAAAAATgo/qPoKhS8xaXo/basement%252520love%25255B4%25255D_thumb%25255B1%25255D.jpg?imgmax=800)
Almost all were recessed lights – all but five. I mentioned before that I wanted to use some smaller lights – maybe mix up the standard six inch cans with some four or five inch versions.
Well, I didn’t realize how much those smaller lights cost. ;) It was a bit ridiculous, especially considering they are SMALLER, so therefore you’d think they’d cost LESS. Nope.
So, we went with all six inch recessed lights, everywhere. ;)
In the storage room and laundry (the one with hearts), we did one simple overhead light:
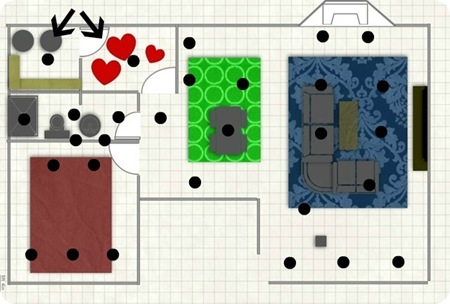
I was afraid the one in the laundry wouldn’t be enough, but considering whatever we hang up there will have at least two bulbs, I think it will be OK. And we’ll most likely add a small lamp on a counter or something.
Overall, the bathroom has a crazy amount of lights considering it’s size, but if you’re gonna have too many lights, the bathroom is the place to do it:
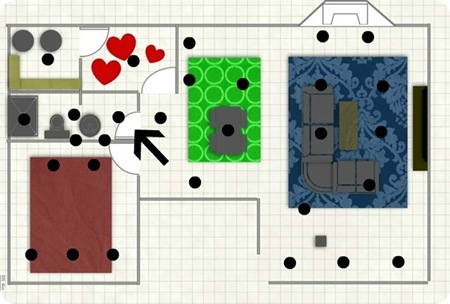
There’s a shower light and one at the entrance on one switch, a fan with a light on another and two sconce lights next to where the bathroom mirror will go (on another switch).
Whew. I told you, lots of lights. :)
But the fact that they are operated independently makes them less surface-of-the-sun-ish and more task lighting-ish.
In the family room, most of the lights are recessed. There are a couple on one switch over what will be a fireplace (someday) in the bump out:
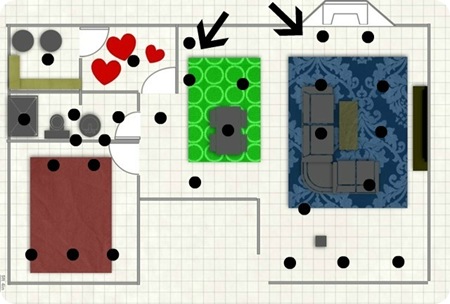
And then there are a couple pendant lights roughed in over what will be the bar area (on another switch).
There’s one drop down light over the craft table on yet another switch.
The rest of the (12) lights in the family room and hallway are on three different switches – one for the bank when we come down the stairs, one for the lights in the bulkhead, and one for the rest of the room.
WHEW!
So, in the end it ended up being what I set out for in the beginning. A lot of freakin’ lights. :)
But, they are on a bunch of switches (I have learned I love bunches of switches) and ALL will be on dimmers. I luuurve me some dimmers.
Now that everything is done electrical-wise, I’ve been perusing the lighting aisles at every store I visit. I love these two options for the laundry room:

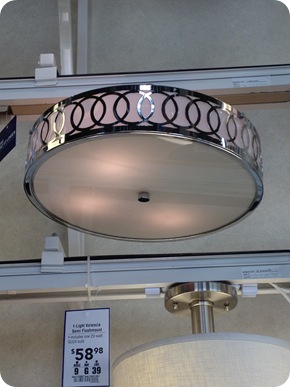
Whatever we use in there will need to be low profile, and have at least two bulbs. I love both of these, but I’m leaning toward the wider, flatter one.
I dig these pendants for over the bar:
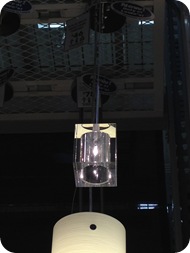

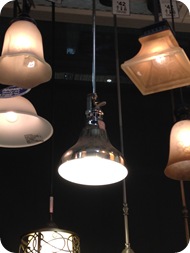
I am leaning toward the cubey one or the one in the middle – it is a bar so we can go a little sleeker in that spot.
I loved these for the sconces in the bathroom:
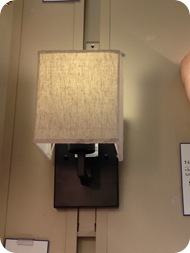
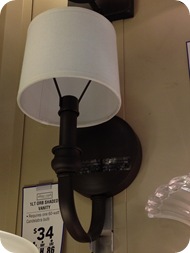
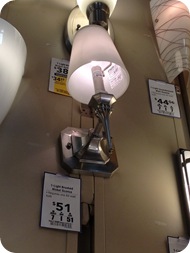
I like the finish on the last one, but the look (and price) of the middle one, so I may just get those and spray paint them.
Nothing escapes my spray paint trigger finger! Buwahahahahahaaaa.
Last time we talked about lighting, I mentioned I wanted to try to put sconces up elsewhere in the basement, but as I thought about it, I knew they may hinder the furniture arrangement/wall art ideas. So we skipped them.
It’s definitely been a learning process, that is for sure! Trying to do what we want, but staying within a budget takes some give and take. I’ll tell you more about the budget in a future post, but I’m happy to say that overall, the whole basement finishing process will cost WAY less than we thought it would. I have a number I’m trying to stay under and so far so good.
I’m not going to say what that number is yet cause when I say things out loud I tend to jinx them. ;)
Next up, finishing up the rest of the before-drywall stuff (which I’ll post on soon), and then drywall! WHOO!!! So exciting!!
So, which lights would you pick for the laundry, bathroom and bar from up above? My options are still wide open. I will probably purchase and install all of those last, so if you have other ideas, feel free to link to them!
Thanks again for coming along on this process with us!!
P.S. I think I said “switch” 65 times.